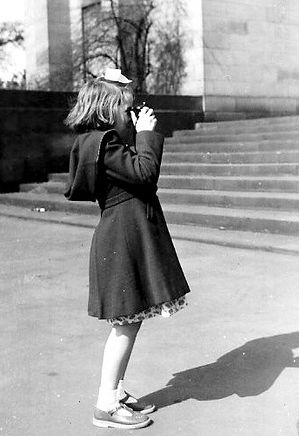
 Eye Candy – It works!
During some of our blogging/social media webinars, we have been known to give honest, first impression reviews of websites submitted by our attendees. No punches are pulled and the feedback is often direct and unfiltered. I’m sure some feelings are bruised, but they are asking for an honest assessment and we give it to them. The feedback we have gotten from attendees on the website reviews has been overwhelmingly positive.
I bring this up because of all the common infractions we see in the real estate blogs submitted for review, the lack of imagery in the articles is most apparent.
There are many elements to developing blog content that gets read, but arguably the most important (after the headline) is the inclusion of interesting imagery.
Most online readers need an instant connection and continuous stimulation (eye candy) in order to gain and maintain their interest. Leveraging an image (or 2 or more) to enhance your message can mean the difference between a 5 second glance and a 3 minute read of your content.
Here are some sound tips and tools for finding, editing, enhancing, and inserting images.
Where Do You Find Great Images For Your Blog Articles?
The wrong answer is Google images.
You must resist stealing, borrowing, improperly and/or ignorantly using images on your site. Regardless of how easy it is, how little the odds are that you’ll get caught, or whether you knew your were illegally using the images or not, it is still against the law. The penalty for getting caught illegally using just a single image can cost you of 1000s of dollars. Here are a few articles to scare you straight.
In fact, there’s a browser plugin called TinEye that allows you to do a reverse image search, exposing other uses of an image on the internet. It’s amazing.
The Most Sound Resource Should Be Your Own Camera.
Every real estate agent should know their way around a camera and keep one in the car. Taking better than average photographs of property is an essential skill. Now apply this to the world about which you are blogging. Our regular guest author Teresa Boardman personally snapped the majority of the images she uses in her blogging.
Browse Affordable Stock Image Websites
At around $1 an image you can’t go wrong or broke selecting images from millions of quality images.
Here are a few of my favorites:
123RF.com
iStockPhoto.com
VectorStock.com
EveryStockPhoto.com
BigStockPhoto.com
DreamsTime.com
Fotolia
In addition to the pay-per-picture options above, Stock.xchng is a great library (400,000+) of free stock images. (continue reading below for more free image resources) Please note: Not all of the images presented in their database are free. The results of searches provide both free and premium results.
The premium results require a financial investment.
Disclaimer: Use images from all of the above services at your own risk.
There are detailed restrictions, rights, usage options and licenses for every image your download from these services. Read each carefully in order to understand your rights. I specifically suggested the above because as far as I understand, once purchased, you have the right to use them in your online marketing efforts, including blog articles as long as they are not used for pornographic or unlawful purposes such as spreading hate, discrimination, or defamation.
The Little Known Creative Commons Option

The Creative Commons Copyright License allows the work (in this case, image) to be taken advantage of as Reusable Material.
The work is still owned by the individual creator, however it may be freely reused without the creator’s permission according to the terms of a CC Copyright license.
In most cases a simple attribution (“Photo by Artist Name and a link to their website if possible) to the original author of the work is all that is required for it’s lawful use.
Again, you must not violate the terms of use as disclaimed above, and double check the license of each and every image you consider reusing. If you want to be super secure in your use of an image, you can always email the author to ensure your lawful use.
Preferred Creative Commons Databases:
Wylio (Awesome CC Search – Hat tip Bill Wilson)
Wikimedia (your rights to use images)
Flickr Creative Commons (Attribution License)
Expired Copyrights & Public Domain Images
Images in the public domain got there because they either had no copyright, it expired or it was released to the PD by the original author.
Currently, for images that were published before 1923 in the United States, their copyrights are expired and free to use in a medium such as your real estate blog.
Here is great list of Free To Use Public Domain images:
StockXchng (over 400,000 images)
TotallyFreeImages.com (~500,000 images)
PublicDomainPictures.net (over 10,000 free images)
StockVault.net (Over 20,000 images)
Photos8.com (over 12,000 free images)
Sunipix.com (over 10,000 images)
FreeStockPhotos.biz (over 10,000 images)
PDPhoto.org (1000s of images)
Bestphotos.us (1000s of images)
CopyrightExpired.com (large collection of illustrations from popular sources pre-1923)
HistoryPicks.com (Large database of free to use historical photos and illustrations, pre-1923)
Fair Use of Copyrighted Works
The biggest concern that I have with people using copyrighted works and claiming “fair use” is that fair use is actually determined on a case by case basis.
My suggestion is that if you are unsure as to whether or not you are protected under a “fair use” scenario then you should avoid using the work for fear of subjecting yourself to legal challenges.
Some Examples of Fair Use
Parody
Criticism
News Reporting/Commentary
Teaching
So it seems, that if you are making fun of, criticizing, reporting on, or teaching about something that would be enhanced with a copyrighted work, then you are protected by fair use.
 For example, I could include the logos of any of the services/websites/tools that I have mentioned in the article because I am teaching and providing commentary on them. Or, if a real estate company just launched a new iPhone application, I could use both iphone and the real estate company’s logos or product images as a reporter of the news. And finally, if I wanted to photoshop an image in such a way that I am parodying the work then I am also (potentially) protected.
There are so many grey areas and stipulations, however, when it comes to being protected under the fair use law that I recommend further reading, or complete avoidance.
Asking Permission of the Photographer or Artist.
Coming across the perfect image doesn’t always happen in the stock image databases. This doesn’t necessarily mean that you can’t legally use it. Being granted permission is sometimes as easy as a quick email or phone call to the artist. I would expect an attribution requirement at a minimum, but for the perfect image it could just be worth the effort.
Clip Art, If You Must
To me, most clip art cheapens a blog article. But if you want to poke around and look for that exception, feel free using this list of Public Domain (free) clip art databases:
ClipArt-History.com
http://www.PDClipArt.org
http://www.OpenClipArt.org
http://www.WPClipArt.com
In case you missed it above, I must stress that you are responsible for the lawful usage of any images you find online. I have tried to provide you with excellent resources for affordable and free images to use in your blogging, but I can’t be certain that all images you find are indeed licensed in a manner that permits you to do so. Use these services and images at your own risk.
Image Editing for Your Real Estate Blog – My Favorite Tools
Cropping, resizing, flipping, colorizing, brightening, framing, etc. need to be easy in order for most to take the time to do it.
The following list are the free tools we use and train our clients to use.
IrfanView (Funny name, amazingly easy and versatile desktop program.)
Photoshop Online (takes some practice, but it is crazy good – online editor)
Pixer.us (easy and basic online editor)
PicMonkey (robust online editor)
If you are a dedicated blogger, I highly recommend becoming familiar with these types of programs. When your blog articles are the first impression received of your business online, it only makes sense to put your best foot forward. Styling images to look great and fit within your articles is crucial.
Watermarking Images – Protect Your Art

Just because you are careful not to use work without proper licensing, doesn’t mean that others are as moral and law-abiding. Tastefully watermarking your unique images can help protect you from theft and reinforce that you are in fact the artist as well as the author!
Using either the Photoshop Online or the PicMonkey applications you can easily add tasteful watermarks to your images in seconds. Your first attempt may take you a few minutes to navigate through, but you’ll get the hang of it quickly.
The steps are easy.
1. Visit application of choice.
2. Upload image
3. Navigate to “Create” on PicMonkey or “Decorate” in Photoshop Online.
4. Select Text
5. Choose a location, font, color and size.
6. Adjust “Fade” (PicMonkey) or “Opacity” (PSO) to preference.
7. Save and Done.
How To Properly Add Images To Your Blog Articles
One of the other immediately recognized challenges we saw during our “first impression reviews” was the poor placement of images within blog articles.
Common examples of this challenge are:
Images are too small
There is no breathing room between the image and the text
Text is not being ‘wrapped around’ the image
Poor placement choice of image within the text area
The images are placed ‘below the scroll’
Less obvious challenges are:
No descriptive ‘alt title’ or image name added
Lack of a border around image
Failing to use the image as a Call To Action that links
Basic Suggestions for Placement of Images in Your Blog Articles.
1. Place your first image toward the beginning of the article.
I generally place mine above the first paragraph, but I also really like when the image is placed to the right side of the paragraph.
Placing the image in the upper part of the article guarantees that it will be noticed and you’ll gain the desired effect of including the image in the first place; it helps tell the story.
In order to get the image level/even with the first line of text (which I think looks very clean) you need to place the image before the first letter of the first word in the first paragraph. From here you use the image formatting tools to align it to the right. This will allow the words to wrap around the image that now sits to the far right of the container.
Similar to the first image, the rest of your article images should either be formatted to fit at the beginning of paragraphs (or similar break in text) OR placed between paragraphs in the case where you have a wide horizontal image.
2. Advanced Editing options make images look more professionally placed.
In WordPress, after you have an imaged located in your article, you can access the advanced options by clicking the image and selecting the Edit Image icon (tiny landscape). At the top of the interface that appears select the option for Advanced Settings. From here you can add a Border (I regularly use “1” to add a 1 pixel thin black line around the image) and Horizontal Space (I usually use “10” to give my images a 10 pixel empty space of padding from the article text).
3. Don’t be afraid to use large images and please stop using tiny images.
If you have selected images that are worth displaying, then showcase them properly. Determine a common size that looks great in your articles and stick with that for most of your images. Go bigger if the story is the image. But little images just look like a cheesy afterthought without much consideration for their impact.
4. Name your images something that is relevant to the article.
Far too often I see images named something like IMG_1024.jpg. The only way that image will be found in a Google Search is if someone happens to be searching by image number. By simply changing the name to something more appropriate such as “6 Shipman Rd” (given it is a picture of a house) you can almost guarantee front page exposure. Consider the context and keywords of the article and use those. There’s no excuse, it’s too easy to not be doing this.
5. When appropriate, link the image to something of value.
Generally, If something that attracts attention is clickable (within an article) it gets clicked. Use your images as Calls To Action to related articles, categories, home searches, galleries, etc. You’ve got the audience, now lead them where you want them to go.
If you can’t make the content happen because you don’t have the time, or interest, or language skills, then you need to seek someone who does. Having strong content on your website is crucial for connecting with your visitor and that is the first step in “generating leads.”
Don’t just hire whomever to help with your website’s content. Hire someone who cares and understands your business. Hire someone that you are willing and able to spend time with to train to write on your behalf. This relationship needs to be healthy and maintained in order for you to get the results you want.
Let us do it!
- We research it
- We write it
- We polish it
- We optimize it for Google
- We publish it to your website
You get to sit back, look amazing, and take all the credit.
If this sounds interesting, let’s have a 10 min call to show you how we’re the reason you’re going to be found in Google.
Curious to learn more? Visit: TomatoCopy.com


